

In nearly every engagement I get the question why it’s not possible to assign Azure AD roles based on Azure AD or synced AD groups. Also, in my opinion this would be a nice feature to have in a productive environment. I started building a solution based on Azure Automation, which takes care of it with the following features:
- Assigning Azure AD Roles based on group memberships.
- Ignoring Service principals assigned to roles.
- Automatically creates new groups for new roles.
- Possibility to exclude some roles and user accounts from automatic management. For example, the Emergency Account can be excluded so it will never lose his permissions.
In this blog I explain how you can setup this in your environment. First of all we need an Azure Automation account, if you don’t have one you can start by following this guide: https://docs.microsoft.com/en-us/azure/automation/automation-create-standalone-account
Important is, that you also create the Run As account:

As soon you have setup the Automation account, we can start configuring the solution.
Grant Azure AD Permission to the Automation account
The newly created account does not have any permissions in our environment. This we have to change first.
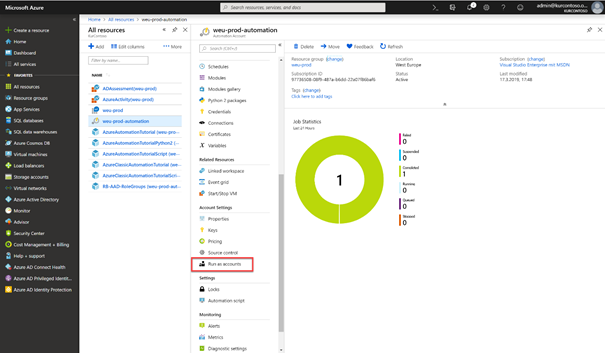 |
First of all, we have to get the Service principal ID of the Run As account. To get this click on “Run as Accounts” in the main menu of the Automation account. |
 |
Then select the “Azure Run As Account” and not the classic account. |
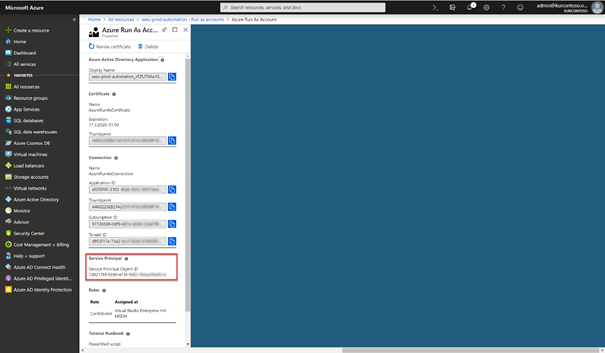 |
Now you can copy the Service Principal Object ID. |
|
# Enter your Run as account Service Principal ID $SPId
# Connect to Azure AD Connect-AzureAD
# Get the associated Service Principal for the Azure Run As Account $runAsServicePrincipal = Get-AzureADServicePrincipal –ObjectId $SPId
# Add the Service Principal to the Global Administrator Role Add-AzureADDirectoryRoleMember -ObjectId (Get-AzureADDirectoryRole | where-object {$_.DisplayName -eq |
Start PowerShell and connect to you Azure AD. If you have not installed the AzureAD PowerShell module install it by using the following command:
Install-Module AzureAD The commands will grant the Global Admin Permission to this Run As account. The Script can be found on GitHub. |
Add the AzureAD module to the Automation Account
 |
To enable the AzureAD module you should open the “Modules gallery” in the main menu. |
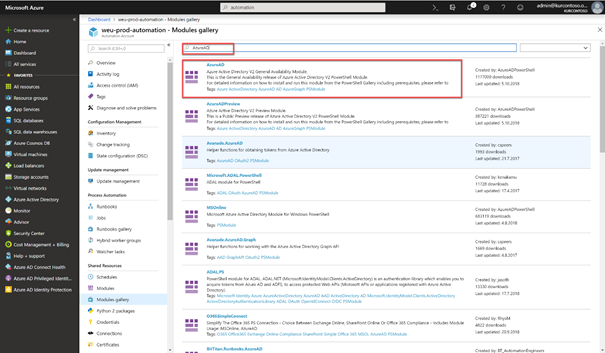 |
Search for AzureAD and click on it. |
 |
Then select “Import” … |
 |
… and approve start the import with “ok”. |
Creating the RB-AAD-RoleGroups Runbook
The main part of the implementation is configuring the runbook, which is the intelligent component to manage the roles for you.
 |
In the main menu select “Runbooks”. |
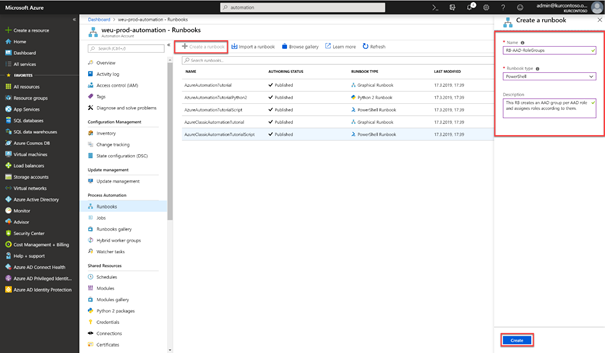 |
Create new runbook of Type PowerShell. As name you can use “RB-AAD-RoleGroups” and as description “This RB creates an AAD group per AAD role and assigns roles according to them.”. |
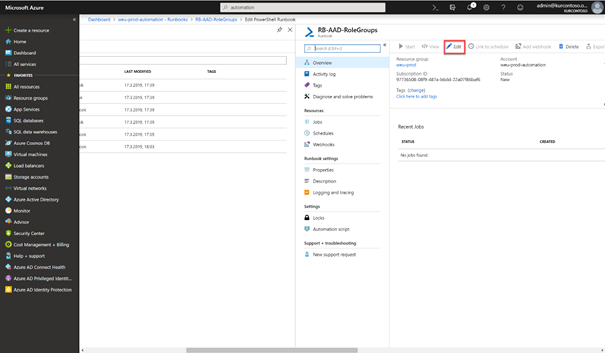 |
In the new runbook click on “Edit”. |
 |
You can copy in the content from Github.
The script creates a group for every role which is available in AzureAD. To have a meaningful name I suggest changing the prefix according to your naming convention. To do this you have just to switch the change the GroupPrefix variable: $GroupPrefix = “sg-Role-” Some Roles from Azure AD you cannot, or you don’t like to manage. You can exclude them by their name (Do not remove User and Guest User): $ExcludeRoles = @(“User”,“Guest User”) Additionally, I highly recommend specifying your emergency account or your own account at the beginning in the ExcludeUsers variable: $ExcludeUsers = @(“admin@aaaaaa.onmicrosoft.com”) |
 |
Then “save” and “publish” the runbook. |
 |
Now you can start the runbook … |
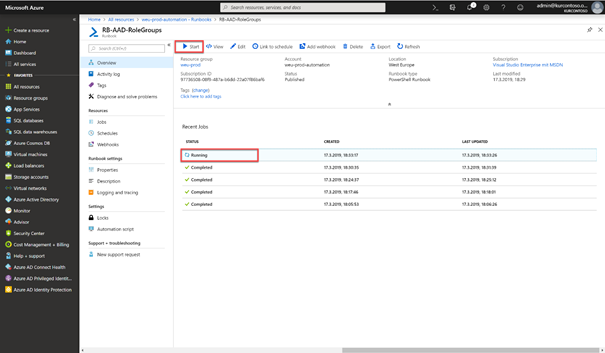 |
… monitor the execution and by clicking on it. It is important, that you add now all users to the groups which currently have one of the roles. Otherwise all users will loose their assigned roles. |
 |
You can also see detailed logs when you click on the job. |
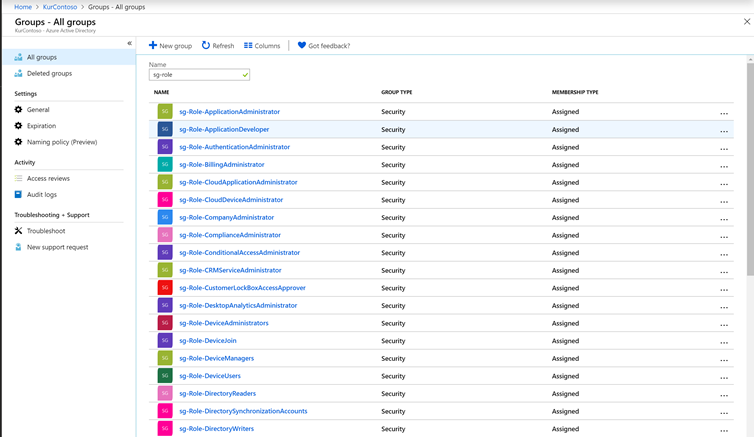
Result
The script created automatically new groups which you can start using. If you like to execute the script for example daily you can easily create a schedule for the runbook according to docs.microsoft.com.
- Microsoft Sentinel ASIM Parser demystified - March 31, 2024
- Enhancing Network Security Insights with IDS/IPS of Ubiquiti Dream Machine Pro and Microsoft Sentinel - March 10, 2024
- Ubiquiti Dream Machine Pro Logs to Microsoft Sentinel - February 6, 2024

2 Comments
Nuno · June 20, 2020 at 07:59
Hi Thomas,
Thank you so much for the great post! This is exactly what I was looking for.
I have been testing your method and it seems the Run As account needs to be a Company/Global Admin as you mentioned. I tried with “Groups Administrator” and even “User Administrator” but it didn’t work… Do you know why? Being a GA is overkill for such task and hard to explain to senior management…
Thank you so much!
Best regards,
Nuno
Thomas Kurth · June 21, 2020 at 14:36
Hello Nuno
Yes that is correct, at that point in time, this was the requirement. Today it should be possible with “Privileged Identity administrator” according to https://docs.microsoft.com/en-us/azure/active-directory/users-groups-roles/roles-assign-graph
Regards
Thomas