How often do you have a problem with a single application and would like to reinstall it easily? With SCCM you have to add the client to an uninstall collection, wait until the client has received the deployment and then remove it from the uninstall collection and add it back to the install collection. Or are your helpdesk employees enabled to do the reinstallation manually?
The reason for this blog post is, there is no good and easy solution…
If you are using netECM:Launcher you can now use my repair application script.
There are a few requirements:
- User has to be a local Administrator on the clients(If UAC enabled, in elevated mode)
- Local Launcher Cache enabled (Attribute createLocalCopy set to true) or UNC application share accessible from the clients over SMB(Read permissions are required).
- Script is located in the launcher installation directory.
- Remote PowerShell enabled on the clients, if remote repair is required.
Installation
- Copy script to Launcher installation directory (%ProgramFiles%\Netree\netECMLauncher\netECM_RepairApplication_001.ps1)
- Customize the variable $DeploymentShare in the script. The deployment share has to correspond to our naming conventions, which are described in the following blog post.
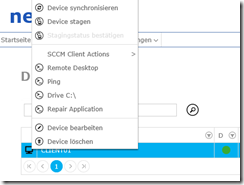
- If you are using netECM:UserDevice, you can add the repair application action to the Device Actions in the web interface.

- For this you have to modify the device type and add the following Device Action:
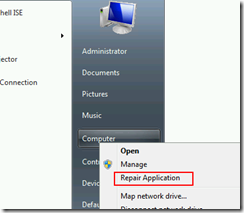
powershell.exe -executionpolicy bypass -command “Invoke-Command -ComputerName %DeviceName% -ScriptBlock { .’%ProgramFiles%\Netree\netECMLauncher\netECM_RepairApplication_001.ps1′ }; Read-Host” - If you would to run the script locally on the client, you have to run the ComputerCommand.reg on the client. Then the following action is available:

Operation
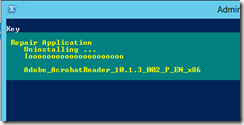
You can start the repair process over Remote PowerShell with the command specified in the installation section, locally over the entry on the computer icon or over netECM:UserDevice. When the script was started, it will display the installed applications according to the netECM:Launcher registry keys. Then you can type a part of the application name to repair and the process should start.
- Microsoft Sentinel ASIM Parser demystified - March 31, 2024
- Enhancing Network Security Insights with IDS/IPS of Ubiquiti Dream Machine Pro and Microsoft Sentinel - March 10, 2024
- Ubiquiti Dream Machine Pro Logs to Microsoft Sentinel - February 6, 2024


0 Comments