Since I work with Configuration Manager, I’m not very happy with the staging process. Every Configuration Manager User knows the problem that applications are installed after the task sequence finished and the customer would like to start using his computer and nothing is displayed on the login screen of windows.
In Configuration Manager 2007 the packages arrived randomly directly after the task sequence finished or usually many minutes later…
Starting with Configuration Manager 2012, Applications should install directly after the task sequence. Should, because I saw also other behaviors… and again, the user has no indication that the staging process has not yet finished. Only if he goes to the software center he see the current installations.
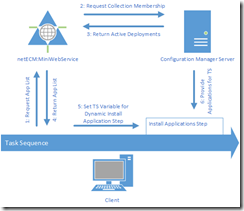
Then I saw different blogs about solutions to install applications dynamically during task sequence. There are solutions to do this with Microsoft Orchestrator and PowerShell. Mostly these solutions only cover user deployments or some of the deployed applications. Additionally they need many open network ports between the site server and the client which is running the task sequence.
For me that wasn’t the solution so I decided to create a web service for my needs. The result was the MiniWebService which is freeware, like the netECM:UserDevice Webinterface.
With this small web service you are able to install device or user and available or required assignments during task sequence. So you can get a list of all apps which are assigned to the current device directly and to his primary users with a required deployment. In some situations you can also only get the required app for a specific user without a primary device assignment. Applications which are already installed are skipped during the installation process.
If you also use Bitlocker pre provisioning if needed, then after the task sequence finished, you have a completely prepared computer which is ready to use for the user. In the next sections I will explain how to setup your environment to get this working.
How to setup MiniWebService
Prerequisites on the server:
- .NET Framework 4.5
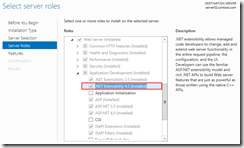
- Windows Server Role: Web Server (IIS) –>Web Server –>Application Development –>.NET Extensibility 4.5
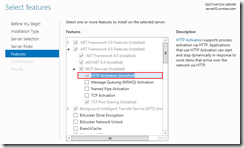
- Windows Server Feature: .NET Framework 4.5 –>WCF Services –> HTTP Activation
Install the Webservice:
Download the actual version of the MiniWebService from our Homepage.
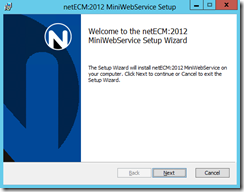
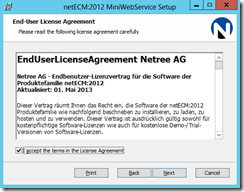
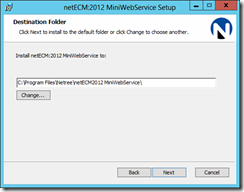
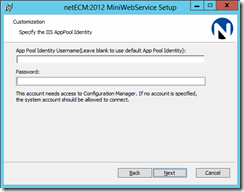
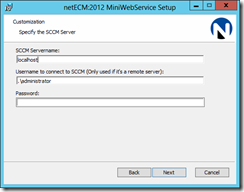
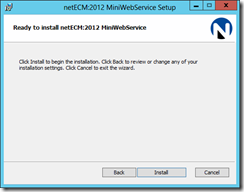
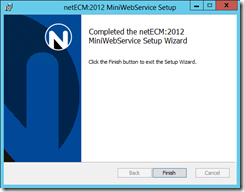
Start the Installation:
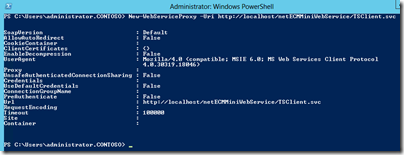
Test the web service:
Open a PowerShell console and type the following command:
New-WebServiceProxy -Uri http://localhost/netECMMiniWebService/TSClient.svcIf you get a message like these, then your service is ready to use:
How to use it during task sequence:
Normally I group the two required steps in a folder together like in the following screenshot:
The first step is gathering the apps from configuration manager over the web service. I have created a PowerShell script which can be used:You can call this script in the task sequence and use the install dynamic applications step according to the following screenshots:
######################################################## ## ##  This Script gets all deployed applications to this device ## ##  Author: Thomas Kurth/Netree ##  Date:   28.2.2014 ## ##  History ##         001: First Version ##         002: Do not use ConvertFrom-Json for PowerShell 2.0 Compatibilities ##         003: Correct Variable to start with 01 and not 00 ## ######################################################## <# .SYNOPSIS This Script gets all deployed applications to this device .DESCRIPTION This Script gets all deployed applications to this device, wheater the application is assigned to the primary user or to the device directly. To use this script you need to have the MiniSccmWebService installed on a server. .PARAMETER ServiceURL This is the url to the webservice. For example: https://servername .PARAMETER GetAvailable With this parameter the webservice will return the available deployments. Default is $false! .PARAMETER GetRequired With this parameter the webservice will return the required deployments. Default is $true! .PARAMETER GetPrimaryUserDeployments With this parameter the webservice will return deployments to the primary users of this device too. Default is $false! .INPUTS None. You cannot pipe objects to GetDeployedAppsForDevice_001.ps1. .OUTPUTS None to powershell. After the script completes you can use the APPID base variable name in the task sequence install application step for dynamic installing applications. .EXAMPLE C:\PS> .\GetDeployedAppsForDevice_001.ps1 -ServiceURL https://servername #> param( [Parameter(Mandatory=$true,HelpMessage="This is the url to the webservice. For example: https://servername")] [Uri]$ServiceURL, [switch]$GetAvailable = $false, [switch]$GetRequired = $true, [switch]$GetPrimaryUserDeployments = $false ) Write-Host "Load TS Environment" If ($Debug -eq $false) { $TSEnv = New-Object -COMObject Microsoft.SMS.TSEnvironment } else { Write-Host "Start without TS Environment" } Write-Host "Load Serializer" [System.Reflection.Assembly]::LoadWithPartialName("System.Web.Extensions") $ser = New-Object System.Web.Script.Serialization.JavaScriptSerializer $p = New-WebServiceProxy -Uri $ServiceURL if($GetPrimaryUserDeployments){ $appsJson = $p.GetAppsDeployedToDeviceAndUser($env:computername,$GetRequired,$GetAvailable) $apps = $ser.DeserializeObject($appsJson) } else { $appsJson = $p.GetAppsDeployedToDevice($env:computername,$GetRequired,$GetAvailable) $apps = $ser.DeserializeObject($appsJson) } $Count = 1 foreach($app in $apps){ $id = "{0:D2}" -f $Count $VarName = "APPID$id" $TSEnv.Value($VarName) = $app Write-Host "$VarName = $app" $Count = $Count + 1 }The result
And now when you stage a computer, he will install all deployed applications during task sequence without requiring some additional network ports.
You can also see the result of the web service request in the host status:
Parameters and customizations
If you would like the service in your own scripts the following options are currently available. As you have seen in my script above, you can create the web service object with this PowerShell command:
$p = New-WebServiceProxy -Uri http://localhost/netECMMiniWebService/TSCLient.svcThen you have these methods available:
$p.GetAppsDeployedToDeviceAndUser([String]Computername,[bool]$RequestRequiredApps,[bool]$RequestAvailableApps)This method gives back the deployments for this device and the primary device of it. With the two additional parameters you can filter the deployments to contain only required or available apps.
$p.GetAppsDeployedToDevice([String]Computername,[bool]$RequestRequiredApps,[bool]$RequestAvailableApps)This method gives back the deployments for this device. With the two additional parameters you can filter the deployments to contain only required or available apps.
$p.GetAppsDeployedToUser([String]Username,[bool]$RequestRequiredApps,[bool]$RequestAvailableApps)This method gives back the deployments for this single user. With the two additional parameters you can filter the deployments to contain only required or available apps.
$p.GetPrimaryUsers([String]Computername)This method will return all primary users of the specified computer.
Summery
Now I’m happy because I have a nice solution for our customers, which helps them to improve the OS deployment process. Try it out and give me feedback(@ThomasKurth_ch) for improvements of the web service.
- Microsoft Sentinel ASIM Parser demystified - March 31, 2024
- Enhancing Network Security Insights with IDS/IPS of Ubiquiti Dream Machine Pro and Microsoft Sentinel - March 10, 2024
- Ubiquiti Dream Machine Pro Logs to Microsoft Sentinel - February 6, 2024



![clip_image002[4] clip_image002[4]](http://workplace.vision/wp-content/uploads/2016/01/clip_image0024_thumb_1ED7EF5F.jpg)
![clip_image002[6] clip_image002[6]](http://workplace.vision/wp-content/uploads/2016/01/clip_image0026_thumb_1ED7EF5F.jpg)
![clip_image002[8] clip_image002[8]](http://workplace.vision/wp-content/uploads/2016/01/clip_image0028_thumb_1ED7EF5F.jpg)


2 Comments
Free ConfigMgr MiniWebService Updated - Workplace Management Blog · February 12, 2016 at 13:16
[…] have updated the netECM:MiniWebService which is available for free. The first feature was the ability to request all device or user targeted applications over http to install them […]
Update Tatooing Information with Compliance Item and netECM:MiniWebService - Workplace Management Blog · February 12, 2016 at 13:18
[…] Install netECM:MiniWebService on your ConfigMgr Server (Manual can be found here) […]